
Operation Source
- Matthew Camilleri
- Nov 25, 2023
- 15 min read
In the early hours of 22nd September 1943, three British midget submarines penetrated a heavily guarded Norwegian fjord in an attempt to sink the mighty German battleship Tirpitz after several earlier attempts to sink her from both air and sea had failed. Operation Source, as it was known, was undoubtedly one of the most daring naval raids of World War II.

Tirpitz and her sister ship Bismarck were the largest and most powerful warships built for the Kriegsmarine. Their formidable main armament consisted of eight 38 cm guns arranged in four twin turrets. They were heavily armoured, with a main belt of 320 mm, but were nonetheless able to reach a maximum speed of 30 knots. Tirpitz was laid down at the Kriegsmarinewerft shipyard in Wilhelmshaven in October 1936 and was launched in April 1939. She was still not ready when war broke out, and between July 1940 and February 1941, British bombers carried out several air raids against Wilhelmshaven but were unable to hit Tirpitz. She was finally commissioned on 25th February 1941.
After completing sea trials, Tirpitz was stationed in Kiel, and, following the German invasion of the Soviet Union in June 1941, she became the flagship of a new squadron that was created to prevent the breakout of the Soviet fleet based in Leningrad. The Royal Air Force (RAF) continued to launch unsuccessful bombing raids on Tirpitz whilst she was in Kiel, but, in November, Großadmiral Erich Raeder, Commander-in-Chief of the Kriegsmarine, proposed to station her in Norway, where she could threaten the Allied Arctic convoys and tie down British naval assets in the region. Adolf Hitler approved the plan as he had already forbidden Tirpitz from venturing into the Atlantic following the loss of her sister ship Bismarck earlier that year. She thus underwent modifications and was ready for combat operations on 10th January 1942, sailing to Wilhelmshaven the day after.

On 14th January, Tirpitz left Wilhelmshaven bound for Trondheim. Although British military intelligence was aware of her departure, poor weather in Britain prevented the RAF from launching any attacks. Two days later, a British reconnaissance plane spotted her in Trondheim, but later that same day, she sailed for Fætten Fjord, where she was moored next to a cliff to protect her from air attacks. Tirpitz was camouflaged with nets, while additional anti-aircraft batteries were installed around the fjord, and anti-torpedo nets and heavy booms were placed at the entrance to the anchorage. Two weeks later, the RAF launched the first aerial attack on Tirpitz in Norway, but owing to bad weather, the raid failed.
Even though over the following months, Tirpitz rarely ventured out from her lair, her mere presence in the region forced the Royal Navy to keep a large number of capital ships in home waters to protect the Arctic convoys headed towards the Soviet Union. In March 1942, Tirpitz took part in Operation Sportpalast, a planned raid against two convoys as they passed through the Norwegian Sea. The British had been forewarned through decoded radio signals, leading to the convoys being rerouted, while the British Home Fleet attempted to intercept the German force. Yet, by the time Tirpitz was located, she was already on her way back to Norway, and an attack by torpedo bombers launched from the aircraft carrier HMS Victorious came to nothing. Over the next three months, the RAF launched three further attacks on Tirpitz, but all of them were hampered by bad weather.

On 27th June, Convoy PQ 17 sailed from Iceland, bound for the Soviet Union. A few days later, the Germans launched Operation Rösselsprung, which saw Tirpitz being ordered to intercept. When her presence was reported to the British Admiralty, the convoy was ordered to scatter. This decision proved disastrous, as, without their escorts, the ships became sitting ducks for the Kriegsmarine and Luftwaffe. Only 11 of the 35 merchantmen successfully reached their destination. In the end, Tirpitz never came anywhere near the convoy, as she was recalled to base just a few hours after sailing, but the mere mention of her had been enough to cause chaos. The fate of Convoy PQ 17 led to increased determination to neutralise her. Since bombing raids had proved ineffective, that October, an attempt was made to attack her using Chariot manned torpedoes, but bad weather once more forced the mission to be aborted.
Yet the Admiralty had also been working on another plan. Naval engineers had been experimenting with prototypes for midget submarines intended to attack enemy shipping in strongly defended anchorages. The concept was the brainchild of Commander Cromwell Hanford Varley, a retired submariner who had enlisted the support of Admiral Sir Max Horton, Flag Officer Submarines, and Prime Minister Winston Churchill. Several experimental models were built before it was felt that a feasible weapon had been produced. Named X3, she was launched in March 1942, while a second prototype, X4, soon followed. In the meantime, a call went out for volunteers “for special and hazardous duty”. Candidates were not told what the mission entailed, but over the next months, they were filtered through rigorous selection criteria and those who made the grade quickly found themselves undergoing intense training on the new X-craft.

At the same time, further trials were carried out with the prototypes, whilst modifications were undertaken until a finalised version was approved. The first six operational X-craft, designated X5 through X10, were built at the Vickers-Armstrong shipyard at Barrow-in-Furness and were delivered in January 1943. Initially, each X-craft had a crew of three, consisting of the commander, a pilot, and an engine room artificer (ERA), who operated and maintained the vessel’s machinery. Eventually, however, a specialist diver was also added.
Each submarine was just under 16 metres long and had a gross weight of 35 tons. On the surface, they were propelled by a single 4-cylinder diesel engine which gave them a maximum speed of 6.5 knots and a range of 500 nautical miles. When submerged, they were propelled by an electric engine, powered by batteries that had to be charged whilst the vessel was surfaced. The maximum submerged speed was 5.5 knots, while the range was reduced to a mere 80 nautical miles. The X-craft were tested to a maximum depth of around 90 metres. Their armament consisted of two detachable explosive charges, each containing two tons of amatol, attached to either side of the vessel. These would be released underneath the enemy ship, before being detonated by a time fuse, giving the X-craft enough time to slip away in the meantime.

All X-craft training and planning was coordinated from HMS Varbel, previously the luxury 88-bedroom Kyles Hydro Hotel at Port Bannatyne on the Isle of Bute in the Firth of Clyde, on Scotland's west coast. Before any attack against Tirpitz could be launched, several issues needed to be dealt with, including the question of how to get the X-craft to Norway. The risk of enemy patrol vessels or reconnaissance aircraft being alerted ruled out launching them from a depot ship near the Norwegian coast. After much deliberation, it was decided to tow them to the target area by conventional submarines. Even then, however, the journey would take eight days, leaving the X-craft crews exhausted before the mission even began, so it was decided to use passage crews, which would then be swapped over with operational crews travelling in the towing submarines.
Another critical factor was the timing of the raid. By early 1943, Tirpitz, together with the battlecruiser Scharnhorst and the pocket battleship Lützow, had been relocated to Ka Fjord, a side branch of Alta Fjord, located five degrees north of the Arctic Circle where there was no darkness in summer and no light in winter. Neither of these periods was suitable for an attack, since the X-craft needed the cover of darkness to recharge their batteries, and daylight to pick out the target. The most favourable times would be during the equinoxes in March and September when there were equal hours of daylight and darkness. Since March was deemed to be too soon to allow for adequate training, it was decided to launch the attack at some point between 20th and 25th September.

By July, preliminary trials and training had been completed, and the X-craft were dispatched to Port HHZ, at Loch Cairnbawn, Scotland, for more advanced training, including simulated attacks, rehearsals of towing procedures, and practising how to change over crews at sea. By 1st September, the submarines HMS Thrasher, Truculent, Stubborn, Syrtis, Sceptre and Sea Nymph had arrived, and all that remained was the fitting of side charges and briefing of the crews. The plan was for each pair of submarines to make their way to a position west of the Shetland Islands, from where they would proceed on parallel courses to an area west of Sørøya. The X-craft would then make their way independently across the declared mined area and down Stjernsundet towards Alta Fjord and Ka Fjord. After laying their charges, any surviving X-craft were to return the same way they had come, to rendezvous with the submarines and begin their journey home.
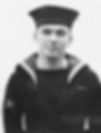
Among those selected for the raid was 27-year-old Scotsman Lieutenant (Lt.) Donald Cameron, Royal Naval Reserve, from Carluke, South Lanarkshire, who was given command of X6. The rest of his crew consisted of Lt. John Lorimer, Sub-Lieutenant (Sub Lt.) Richard Kendall, and ERA Edmund Goddard. Another successful candidate was 22-year-old Lt. Godfrey Place, from Little Malvern, Worcestershire. A regular Royal Navy officer, he had joined the Submarine Service in 1941 and saw action in the Mediterranean, where he was awarded the Polish Cross of Valour for his service as a liaison officer in the Polish submarine ORP Sokół and the Distinguished Service Cross for his role in the sinking of the Italian submarine Guglielmotti by HMS Unbeaten off Sicily in March 1942. He was given command of X7, which was also manned by Lt. Lionel Whittam, Sub Lt. Robert Aitken, and ERA William Whitley.


Under strict secrecy, the boats sailed from Loch Cairnbawn on the night of 11th/12th September, hoping to be in a position to carry out their attack on 22nd September. The passage for the first four days was made in fine weather and proved uneventful. The X-craft were towed submerged, surfacing every six hours to ventilate the craft. In the meantime, reconnaissance flights over the target area confirmed the presence of the enemy ships, and targets were allocated to the X-craft. X5, X6 and X7 were to target Tirpitz, while X9 and X10 would attack Scharnhorst, also located in Ka Fjord. X8 was to target Lützow in the adjacent Lang Fjord.

Early on 15th September, the tow between Sea Nymph and X8 parted, a fact which was not immediately apparent to the larger submarine. Although she eventually turned back around, it was not until late on the following day that contact between the two vessels was re-established and they were able to resume their journey. In the meantime, the tow between Stubborn and X7 also parted, but on this occasion, an auxiliary tow was immediately passed. Early on 16th September, Syrtis turned back to look for X9 when it became obvious that she too had broken adrift at some point during the night. On this occasion, no trace of the midget submarine was found, and she is believed to have sunk with all three of her passage crew: Sub Lt. Edward Kearon, Able Seaman Harry Harte, and Stoker 1st Class George Hollett.
On the following day, X8 developed problems with her side charges, both of which had to be jettisoned. Unfortunately, the underwater explosion from the second charge severely damaged the midget submarine, leaving her unable to dive. As she could now serve no useful purpose in the operation and, if sighted on the surface, might compromise it, the decision was taken to embark her crew on Sea Nymph and scuttle her. The attack on Lützow would have to be abandoned. Yet, by dawn on 20th September, the remaining four pairs of submarines were all in their respective slipping zones near Sørøya, with the operational crews safely transferred. That evening, the X-craft began their approach towards their targets.
Lt. Henty Henty-Creer, a 23-year-old Australian commanding X5, shouted good luck to Lt. Place of X7. This would be the last time that he and the rest of his crew - Sub Lt. Tom Nelson, Acting Sub Lt. Alastair Malcolm, and ERA Ralph Mortiboys - were seen. Soon after, X10 suffered technical problems with both her periscope and gyrocompass. Thus, the following day, whilst the remaining X-craft were making their way along Stjernsundet submerged, her commander, Lt. Kenneth Hudspeth - another Australian - decided to seek a discreet shelter on the north side of Stjernøya to attempt repairs. That evening, having had little success, and unable to navigate whilst submerged, he proceeded on the surface towards the Brattholmen group of islands, where, according to the plan, the X-craft were to recharge their batteries before launching their attack the following morning.


X10 reached Brattholmen at 2.15 a.m. on 22nd September, but since she was in no position to carry out her mission in her current state, Hudspeth decided to continue attempting repairs whilst submerged, in the hope that he might be able to carry out his attack on the following night instead. A short while before, in the meantime, X6 and X7 had both departed Brattholmen for the final part of their mission. By 4 a.m., X6 was approaching the boom gate, when the sound of propellers became audible overhead. Realising what was happening, Cameron brought his craft to the surface and calmly followed a Norwegian trawler through the gate in broad daylight, before diving again without having been spotted.
In Ka Fjord, Tirpitz was secured behind her anti-torpedo nets. Just after 7 a.m., X6 ran aground and broke the surface. Although she was spotted by lookouts on Tirpitz, she was mistaken for a porpoise and no action was taken. Yet, the impact damaged her periscope and gyrocompass, leaving Cameron blind whilst his vessel was submerged. Five minutes later, X6 broke the surface again, and this time she was correctly identified. Cameron continued blindly in the general direction of Tirpitz, with his vessel breaking the surface once more under her port bow. Coming under small arms fire, he backed X6 alongside Tirpitz and released both side charges under "B" turret, before, realising that escape was impossible, he ordered his craft to be scuttled. The four men were taken aboard a German picket boat as X6 sank beneath the surface.

In the meantime, X7 had also managed to get through the boom unseen but ran into trouble soon after, when she became enmeshed in a series of anti-torpedo nets in the middle of the fjord. After having been stuck for around an hour, she finally broke free, but only at the expense of a defective gyrocompass. Continuing towards Tirpitz, she became temporarily stuck again, forcing Place to surface in order to get his bearings. Realising that there was nothing between him and his target, he proceeded to lay one charge under "B" turret just as shots were heard being fired at X6, before going astern underneath Tirpitz and releasing his second charge under "X" turret, still without having been detected.
X7 now needed to make her escape, but without his gyrocompass, and with no idea where to steer, Place once more got his vessel stuck, a short distance from where he had just laid his charges. With the clock ticking, X7 finally broke free but broached the surface accidentally, and immediately came under small arms fire. Diving once more, she again became trapped a short distance away, until, at 8.12 a.m., a violent explosion shook her free. Severely damaged by the force of the explosion, she spent the next hour on the bottom, while Place considered his options. At around 9.30 a.m., depth charges started being dropped around the fjord, and he decided to surface, to give his crew a chance to escape. X7 immediately came under a hail of gunfire, and although Place got out unharmed, his vessel sank beneath him before the rest of his men could extricate themselves. Almost three hours later, Aitken managed to escape from the bottom using the Davis Submerged Escape Apparatus, but Whittam and Whitley were drowned.

In the meantime, following the scuttling of X6, Kapitän zur See Hans Meyer, in command of Tirpitz, had ordered the battleship to be made ready for sea. Yet, the sighting of X7 soon after made him change his mind, since he suspected that further danger might be lurking in the fjord, whilst, in any case, it would have taken at least an hour before Tirpitz could get underway. Suspecting that the raiders had been armed not with torpedoes but with mines, he ordered divers to be sent over the side to check the hull for limpet mines. At the same time, attempts were made to swing the bow to starboard, away from the likely position of any explosive charges, by using the ship’s anchors and mooring wires.
When the explosion came at 8.12 a.m., Tirpitz’s stern was lifted several metres out of the water, with members of the ship's company being hurled into the air like rag dolls, before the battleship came to rest with a slight list to port. It appeared that there had been two or more simultaneous detonations coming from just off the port bow. Whilst it is not clear how many of the four charges went off, subsequent examination of the seabed failed to discover any intact ones, or even fragments, suggesting that all four of them had detonated completely and that only the action to swing the bows of the ship to starboard on her cables had saved her from far worse damage and even, perhaps, from destruction.

Nonetheless, a significant amount of damage occurred. Tirpitz took on over 1,400 tons of water, which flooded several compartments, including No. 2 generator room. All the lighting circuits and much of the power supply were put out of action, as was the port rudder. Most of the bolts holding her machinery in place were fractured, while a fuel oil tank was ruptured. Her four main turrets had been thrown from their roller-bearing mountings. Range-finders and fire control equipment were severely damaged and W/T and radar equipment were rendered useless. The ship's two Arado Ar 196 floatplanes were also destroyed.
At 8.43 a.m., yet another submarine was sighted about 600 metres off Tirpitz's starboard bow. Both heavy and light anti-aircraft guns opened fire and several hits were seen as she submerged, probably damaged. Two minutes later, a destroyer dropped a pattern of five depth charges over the spot. The submarine, which could only have been X5, did not reappear. She is believed to have been sunk before her charges had been placed underneath Tirpitz. Yet, some, including Henty-Creer’s family, believe that his crew had in fact already planted their explosives and that the sinking came as X5 was attempting to make her escape, although this has never been proven.

In the meantime, X10 spent the day dived near Brattholmen, with her crew unsuccessfully trying to make good her defects. Hudspeth eventually decided that any attempt to attack an alerted enemy in his defective craft would be suicide. He therefore decided to abort the mission. With X9 having already been lost earlier, the attack on Scharnhorst was cancelled, although, as it turned out, she was not at her anchorage on that day, so the mission would have failed in any event. X10 reached the rendezvous position late on 23rd September, but despite remaining in the area for a day and a half, she was unable to make contact with any of the towing submarines. Having spent another day and a half resting in a deserted bay on the northern coast of Sørøya, the crew finally made contact with Stubborn in the early hours of 28th September. Yet, a gale warning led to the decision to scuttle X10 during the return voyage.
Thus, of the six X-craft which had set out, none returned. Three men had been lost on the outward passage when X9 sank, while X8 had been scuttled without casualties. X5, X6 and X7 had all been lost during the attack, with six men killed and another six taken prisoner. X10 was scuttled without loss on the way home. The attack had been a tremendous success, as for the loss of only nine men killed and six captured, Tirpitz had been severely damaged and put out of action for around six months. Throughout the ensuing winter, the Germans laboured in Ka Fjord to repair her, but it was not until 2nd April 1944 that she was declared ready for sea trials. Even then, she would never regain complete operational efficiency.
For their part in the operation, Cameron and Place were awarded the Victoria Cross, Britain's highest award for gallantry. Lorimer, Kendall, and Aitken received the Distinguished Service Order, and Goddard the Conspicuous Gallantry Medal. Hudspeth was awarded a Distinguished Service Cross, while another one went to Einar Johansen, a Norwegian resistance operative who had provided vital intelligence about the target. Henty-Creer was not decorated but was mentioned in dispatches (MiD), as were the other three members of X5’s crew, and Whittam and Whitley of X7. Others to get a MiD were Leading Seaman Bruce Element and Stoker 1st Class Norman Garrity of X5’s passage crew, and Able Seaman James Magennis, who had been part of X7’s passage crew. The passage crew commanders - Lt. John Terry-Lloyd (X5), Lt. Arnold Wilson (X6), Lt. Peter Philip (X7), Lt. John Smart (X8), and Sub Lt. E.V. Page (X10) - were appointed Members of the Order of the British Empire (MBE).
In the meantime, attacks on Tirpitz continued relentlessly. On 3rd April 1944, the day after repairs had been finished, aircraft launched from aircraft carriers of the British Home Fleet struck Ka Fjord. Tirpitz received hits from 15 bombs, which inflicted considerable damage to her superstructure and unarmoured areas, whilst 122 members of her crew were killed and 316 wounded. Once more, she underwent repairs which took until mid-July, even as the British attempted further raids using carrier-borne aircraft, all of which proved unsuccessful. Instead, the task of attacking Tirpitz was transferred to the RAF's Bomber Command, and, on 15th September, Avro Lancaster bombers flying from an airfield in the north of the Soviet Union dropped several of the new "Tallboy" bombs that were designed to penetrate concrete bunkers and armoured steel decks before exploding.

Tirpitz was struck by one bomb, and further damaged by several near misses. This time, the damage was massive, and since she was no longer seaworthy, it was decided to use her as a static artillery battery to protect the town of Tromsø. Tirpitz was now within range of bombers flying from RAF Lossiemouth in Scotland, and, on 12th November, Lancasters from the RAF's Nos. 9 and 617 Squadrons, fitted with extra fuel tanks for the 3,600-kilometre operation, launched what proved to be the last attack on the German battleship. Tirpitz was struck by two Tallboys, causing her to list to one side. Shortly afterwards, a tremendous explosion led to her capsizing, taking with her around 1,000 of her crew. Tirpitz was finally gone, and with her, Germany’s ability to threaten the Allied Arctic convoys.